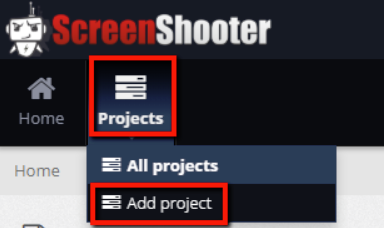
- Projects > Add Project
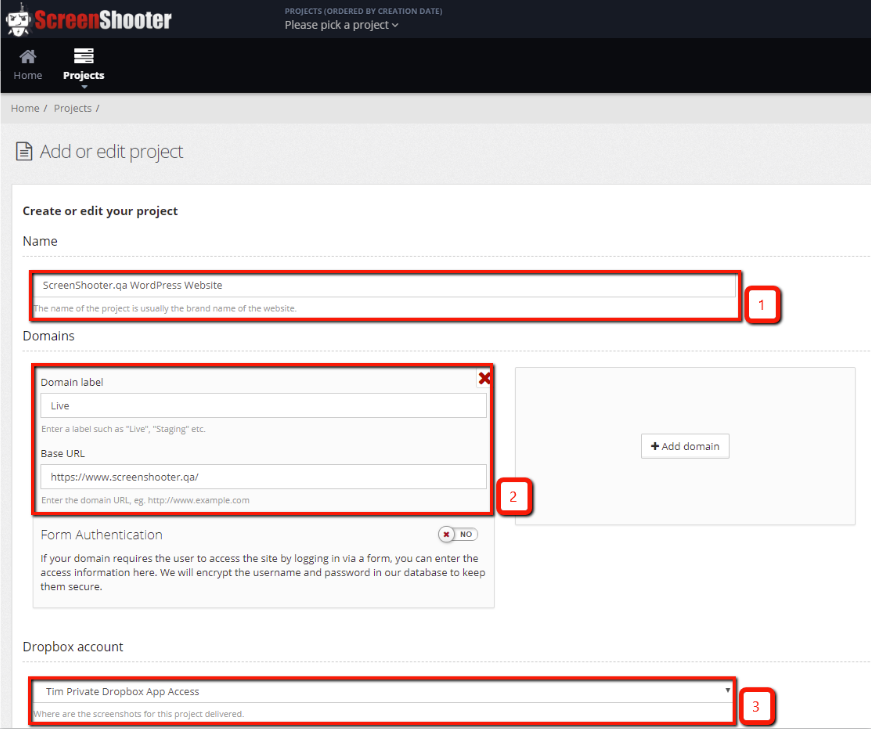
- Give the project a name – The name of the project is usually the brand name of the website.
- Add one or more domains and label them. e.g. “Live” or “Production”, Staging” or “Pre”, “Development”, “QA” etc.
It´s best to copy and paste the URL directly from the browser.
Don’t add domains from different projects here – domains should be environments on the same project. You can add a new project for your other website(s) 🙂 - Choose the dropbox account you want ScreenShooter to send images to

- Settings > Add page elements to hide – as the interface says – you may want to
-
- hide items like: cookie acceptance bars, survey pop-overs etc.
- hide regions with dynamic content that cause a difference when comparing to a reference image that you would prefer ScreenShooter to ignore so that when you compare against reference images differences here don’t cause you to have to recheck the images – differences in these areas are expected.
-
- Settings > Add any position:fixed elements that appear at the top of the page – These are elements that move down the page when the page is scrolled, such as
- a floating header bar
- floating menu.
You need to tell us about these elements so that they don’t appear more than once in the screen shot.
If you have any position:fixed elements located anywhere other than at the top, you probably want to list these as page elements to hide
- Save the project
And now?
Well done! Now you can set your first ScreenShooter crawl going.


